Salesforce Marketing Cloud Connector Setup Guide
In this article, you will learn how to set up the Salesforce Marketing Cloud connector and export an email from EmailShepherd to Salesforce Marketing Cloud.
Package Setup in Salesforce Marketing Cloud
The first thing you need to do is install a new package in your Salesforce Marketing Cloud account.
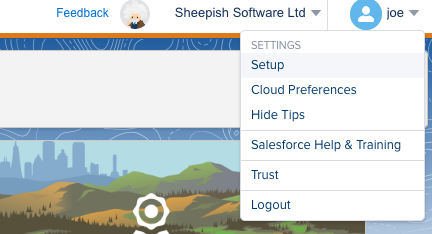
You can do this by clicking on your profile icon in the top right corner and selecting Setup.
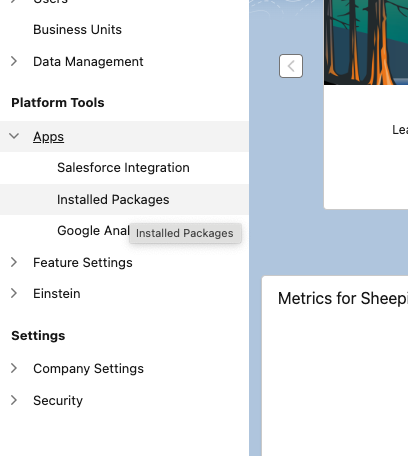
Then, in the sidebar on the left navigate to Apps > Installed Packages.
You'll be taken to your list of installed packages.
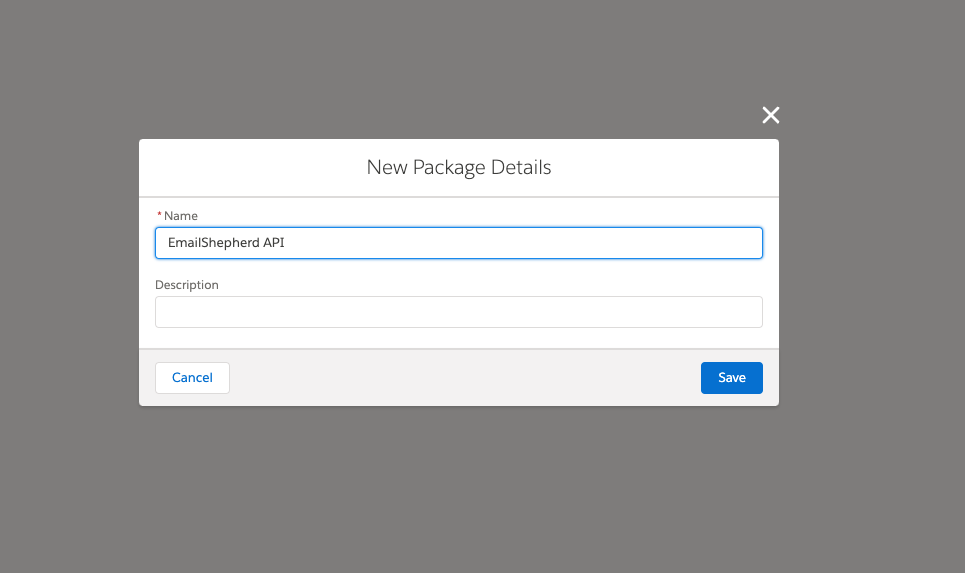
In the top right corner, click on the New button. In the popup enter a name and an optional description for your package. Use something descriptive like "EmailShepherd API" for the name, so that you can easily identify it later.
Click Save.
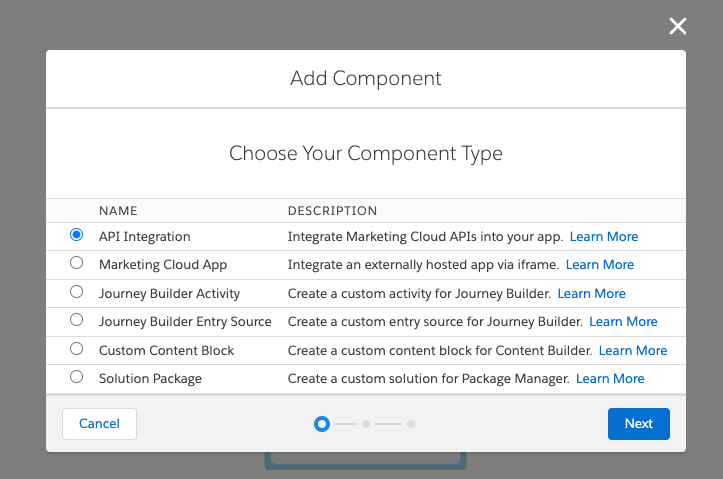
On the next screen, click the Add Components button.
Choose the component type: API Integration
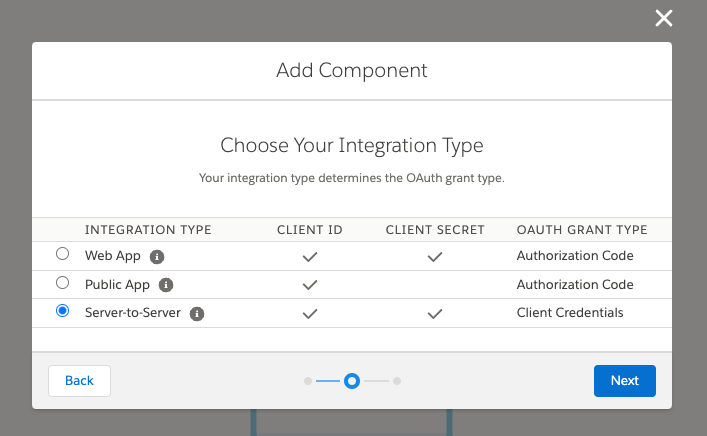
Next, you need to select the Integration Type. Select Server-to-Server
Next, select the scopes required for the connector.
The EmailShepherd connector requires the following scopes:
Channels > Email > ReadChannels > Email > WriteAssets > Documents and Images > ReadAssets > Documents and Images > WriteAssets > Saved Content > ReadAssets > Saved Content > Write
For security best practices, we recommend only granting the above scopes to your component for the EmailShepherd connector.
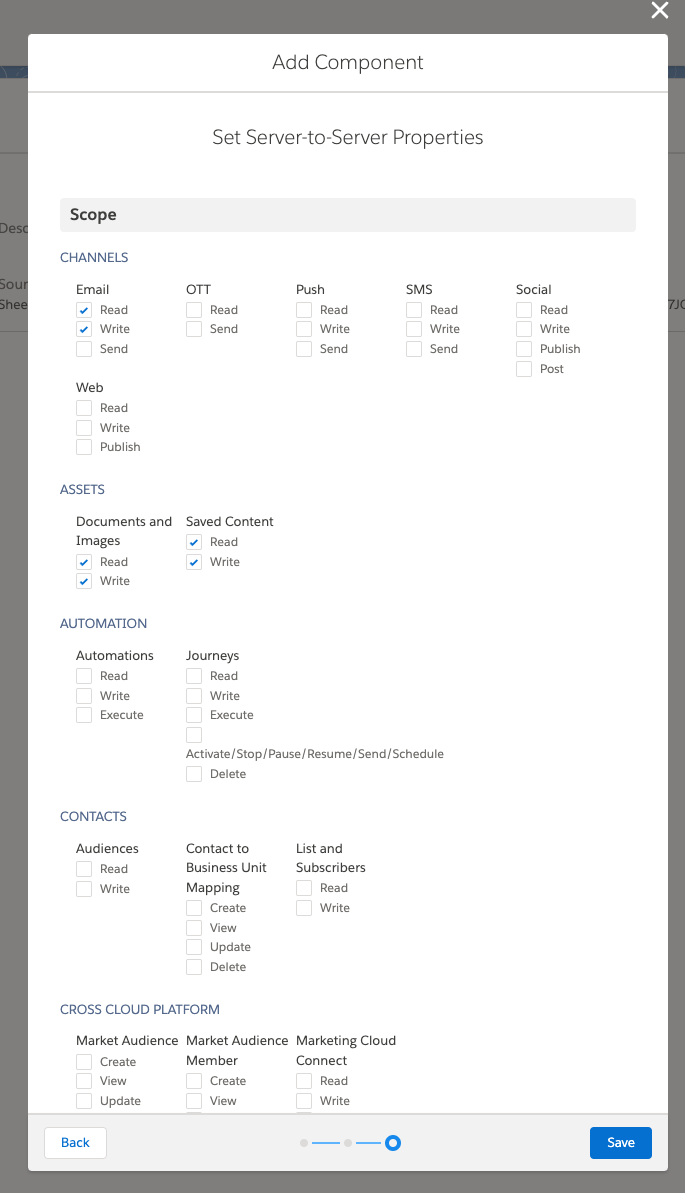
Once you've selected your scopes hit the Save button.
On the next screen you will be shown your Client Secret. Note it down as you will need it when setting up the connector in EmailShepherd.
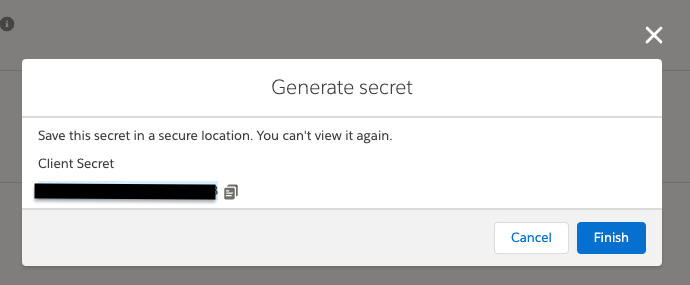
Once you have dismissed the popup you will be taken to the package details page.
Here you need to note down the Client ID.
You also need to note down your subdomain, which is the part in the REST Base URI after the https:// and before the .rest.marketingcloudapis.com/. It will look something like mc4-340qx8pldwck920m8c4l2gy.
Connector Setup in EmailShepherd
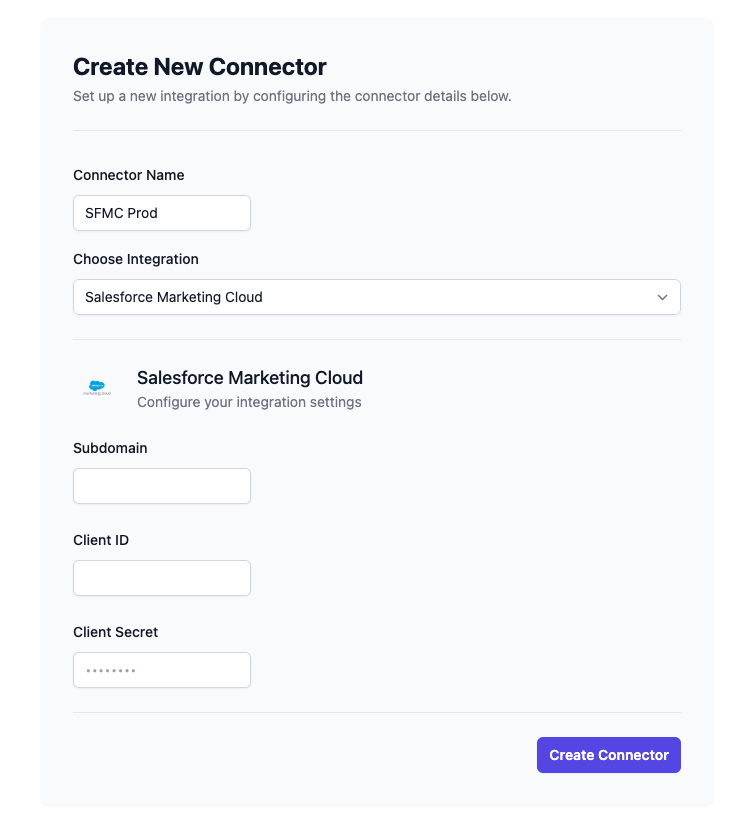
Now that you have your Client Secret, Client ID and subdomain, you can set up the connector in EmailShepherd.
In EmailShepherd, navigate to the Connectors page and click on Add Connector.
Give your connector a descriptive name and select Salesforce Marketing Cloud as the integration type.
You will be prompted to enter the Client Secret, Client ID and subdomain you noted down earlier.
Once you have entered these details, click Save.
You should now see the connector in your list of connectors.
Salesforce Marketing Cloud Templating Syntax
We recommend creating a Dynamic Content Profile to set up your personalization tags and conditionals for Salesforce Marketing Cloud.
Salesforce Marketing Cloud supports dynamic content / personalization using Ampscript.
Exporting an Email to Salesforce Marketing Cloud
-
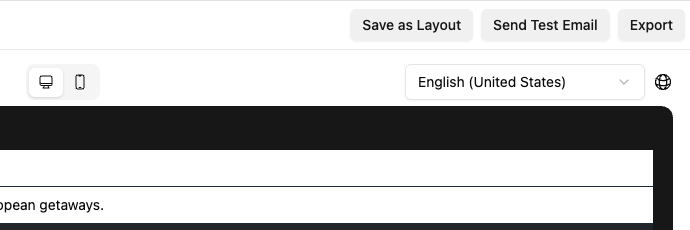
In the email editor, click on the Export button in the top-right corner. This will take you to the Export page.
-
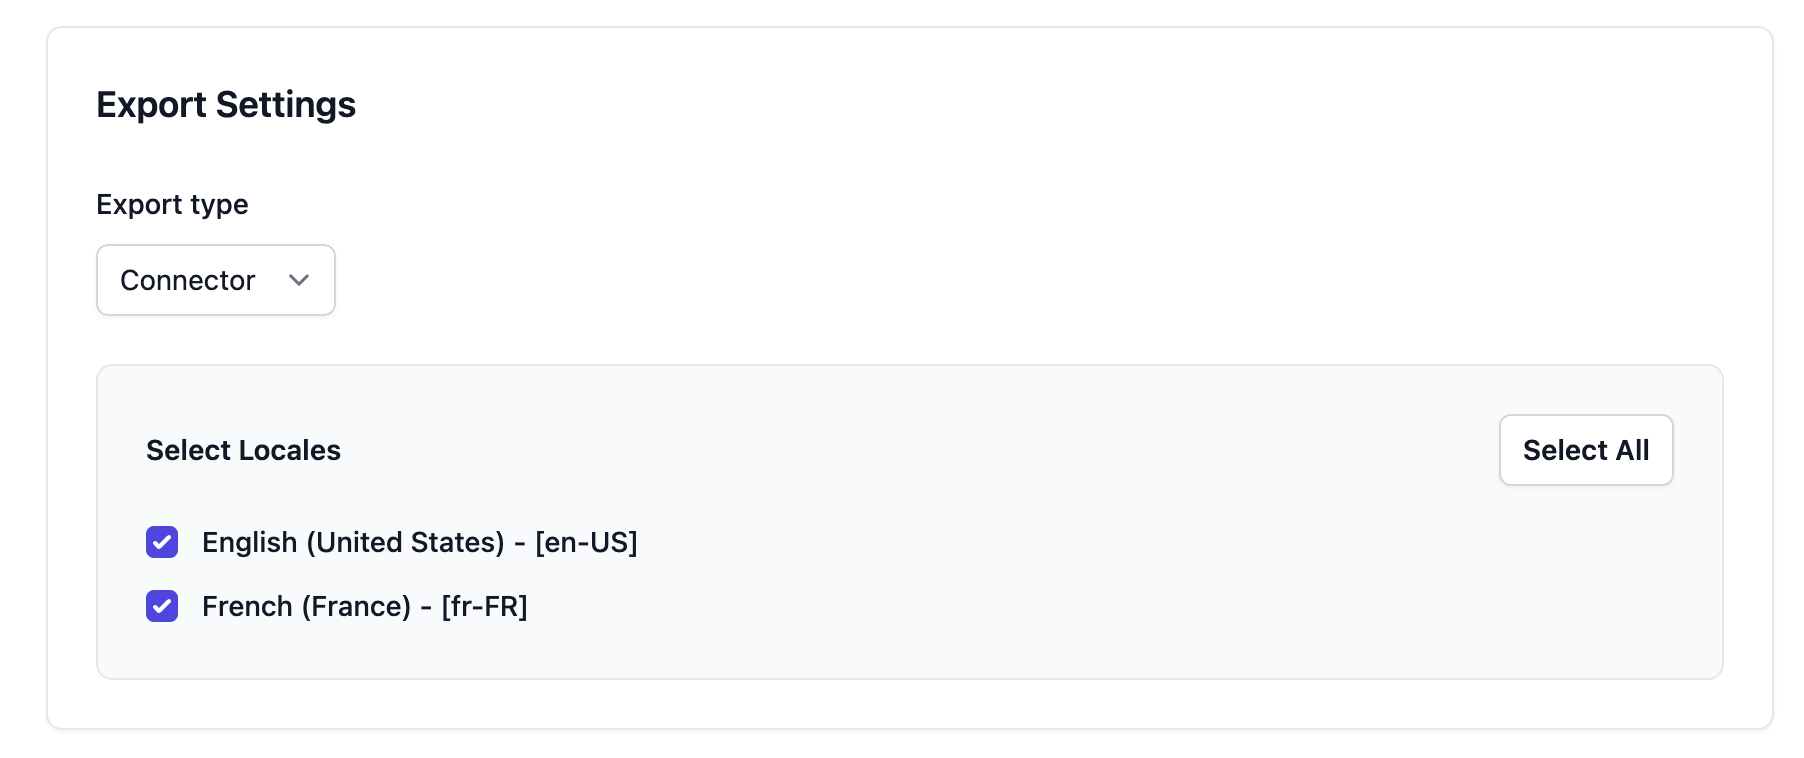
In the Export Settings section:
- Set Export Type to Connector.
- Select the locale(s) you want to export.
-
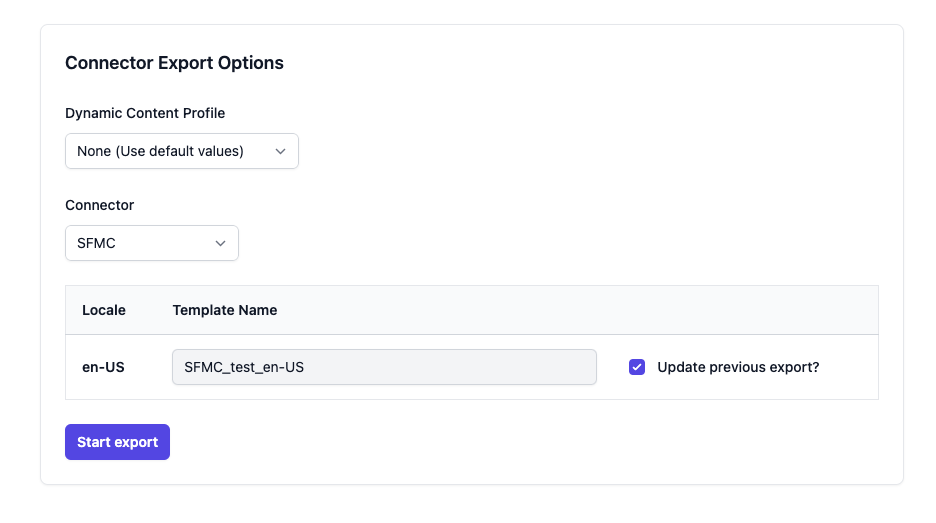
In the Connector Export Options section:
- Select the Dynamic Content Profile you created earlier (if applicable).
- Choose the Salesforce Marketing Cloud connector you set up.
- Enter a Template Name for each locale you’re exporting.
-
Click Start Export.
Once the export completes, you can navigate over to Salesforce Marketing Cloud to see the exported template.