Feeds
What are feeds?
Feeds allow you to automatically populate email components with data from remote sources like APIs. Instead of manually entering product details, blog posts, or other dynamic content into each email, feeds pull this data automatically—saving time and reducing errors.
Example use case: Connect your product API so that when building an email, users can simply enter a product ID and have all product details (name, price, images) automatically populate into the email template.
Permissions required: An Admin or Developer role is required to create, update, or delete feeds. If you are using Custom Roles, the manage_feeds permission is required.
Creating a feed
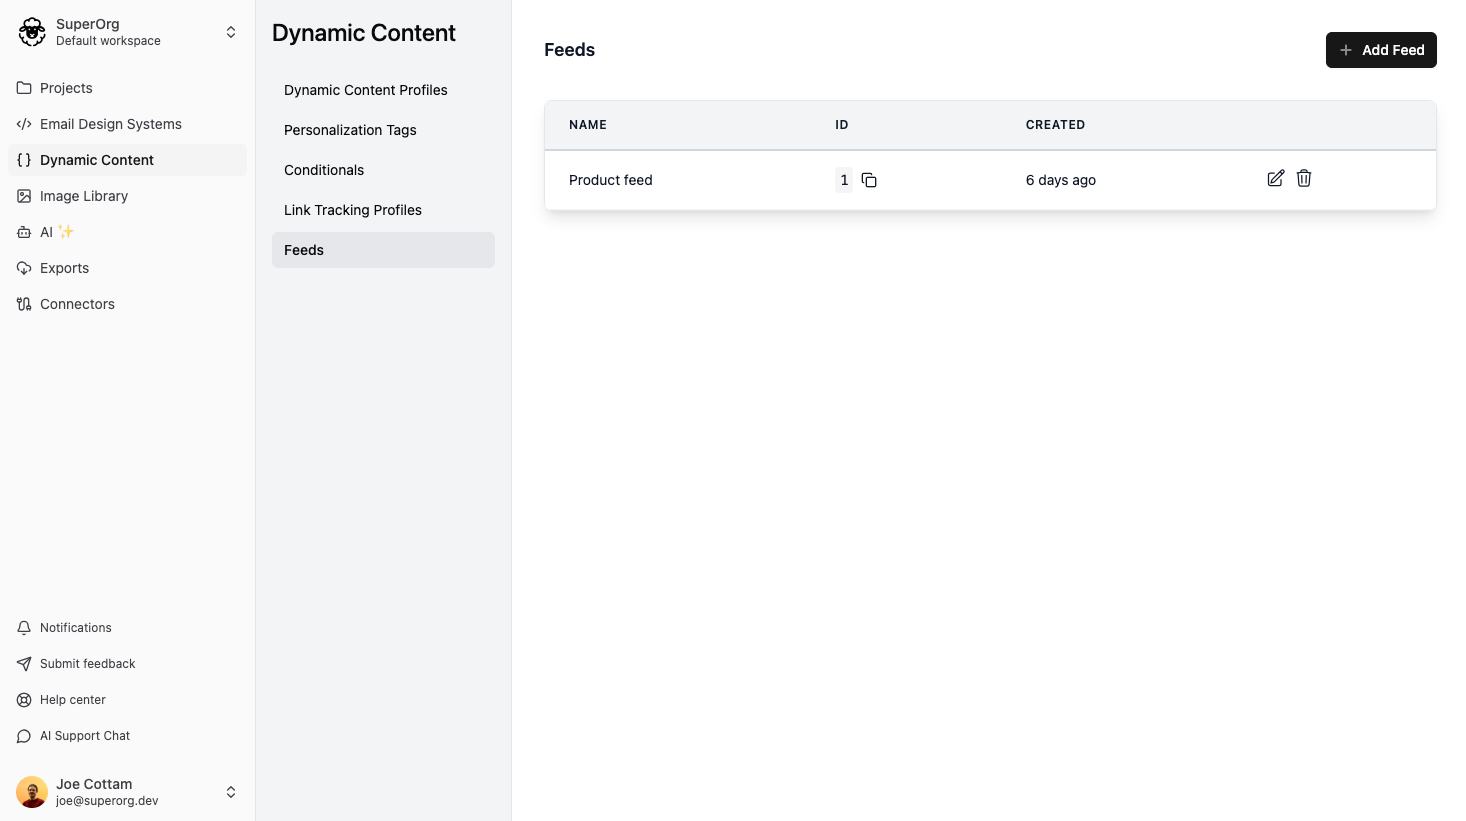
Navigate to Dynamic Content > Feeds and click the Add Feed button.
Step 1: Basic information
Give your feed a descriptive name that clearly identifies its purpose, such as "Product Feed" or "Blog Post Feed".
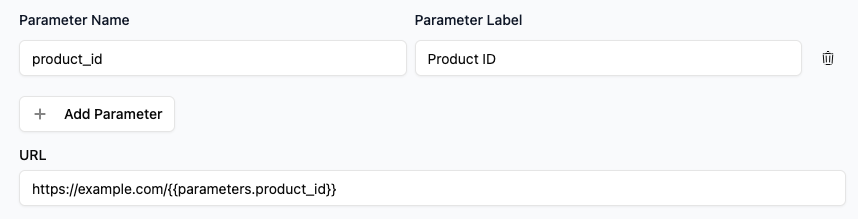
Step 2: Define parameters
Parameters are placeholders that let users provide dynamic values when using the feed. These values get substituted into your feed URL using Liquid syntax.
Example: If your API needs a product ID to return product data, create a parameter called product_id. When users use this feed in the email editor, they'll be prompted to enter the product ID.
To add a parameter, click Add Parameter and enter:
- Name: The parameter identifier (e.g.,
product_id,category,search_query) - Label: The label for the parameter (e.g.,
Product ID,Category,Search Query)
Step 3: Configure the feed URL
Enter the API endpoint URL for your feed. Reference any parameters you defined using the parameters object in Liquid syntax:
https://example.com/api/products/{{parameters.product_id}}
URL encoding parameters
If your parameter values might contain special characters (like spaces in search queries), use the url_encode filter:
https://example.com/api/products/{{parameters.product_id | url_encode}}
Step 4: Add headers (if required)
Many APIs require authentication or other headers. Add them here as key-value pairs.
Common example
| Name | Value |
|---|---|
Authorization | Bearer YOUR_API_KEY |
Content-Type | application/json |
Step 5: Define data fields
Fields tell EmailShepherd how to extract data from your API response and map it to component fields in your emails.
For each field, define:
- Name: The name of the field in the component
- Value: A Liquid template that extracts data from the API response using the
responseobject
Complete example
Let's walk through setting up a product feed step-by-step.
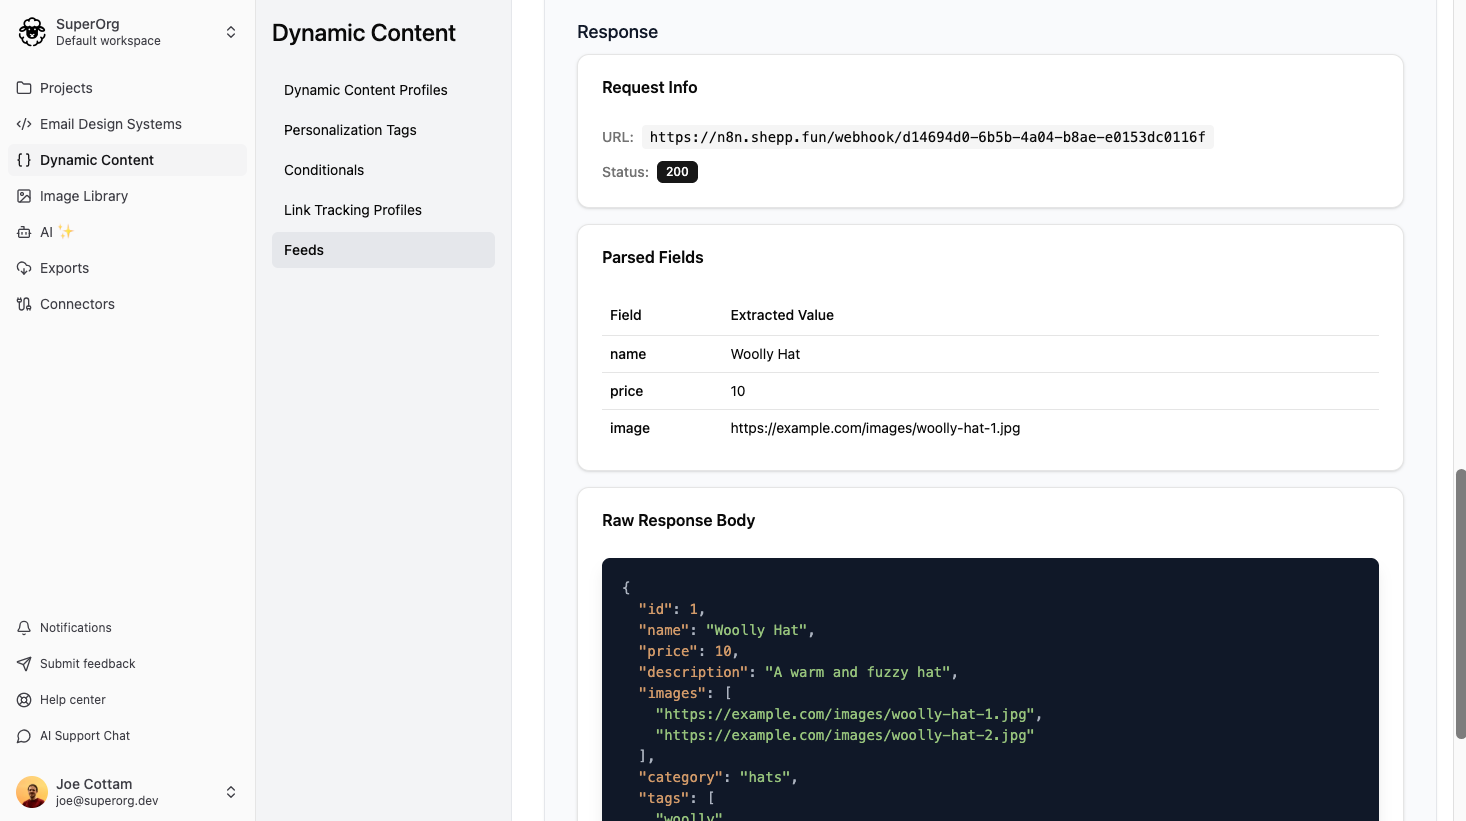
Your API response
{
  "id": 1,
  "name": "Woolly Hat",
  "price": 10.00,
  "description": "A warm and fuzzy hat",
  "images": [
    "https://example.com/images/woolly-hat-1.jpg",
    "https://example.com/images/woolly-hat-2.jpg"
  ],
  "category": "hats",
  "tags": ["woolly", "hat", "warm"]
}
Configuration
Feed name:
Product Feed
Parameters:
| Name | Label |
|---|---|
product_id | Product ID |
URL:
https://example.com/api/products/{{parameters.product_id}}
Headers:
| Name | Value |
|---|---|
Authorization | Bearer YOUR_API_KEY |
Let's assume you want to extract a name, price and image to map to the product component.
| Name | Value | Result |
|---|---|---|
name | {{response.name}} | Woolly Hat |
price | {{response.price}} | 10.00 |
image | {{response.images[0]}} | https://example.com/images/woolly-hat-1.jpg |
Testing your feed
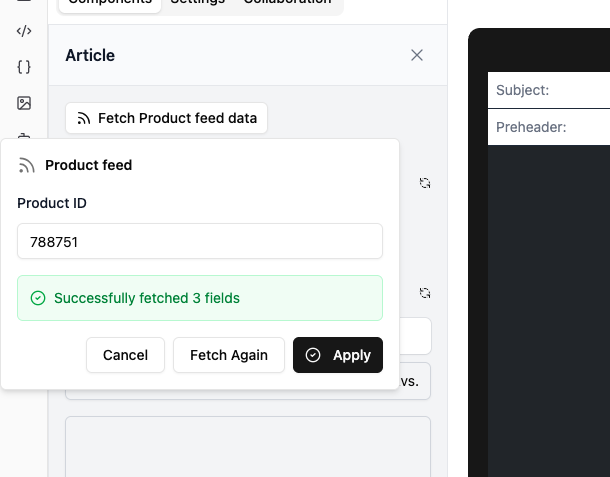
Once you have saved your feed, you can test it below.
Enter the values for any parameters you have defined (if any), and click the Fetch Data button.
You will see a preview of the extracted fields so that you can ensure they are correct. You will also see the raw response body, and the rendered URL that was used to fetch the data.
Mapping data to components
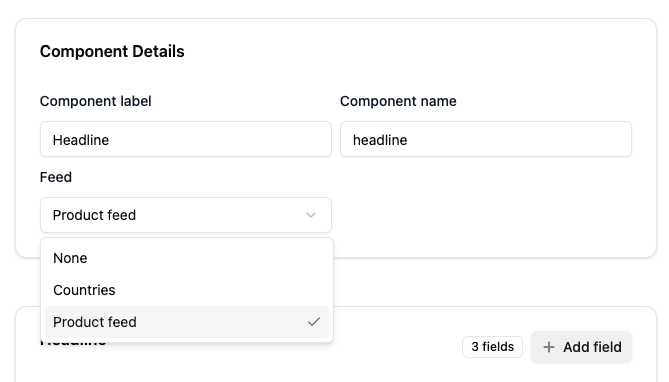
To connect a feed to a component, navigate to Component Builder and select the component you want to connect the feed to.
In the Component Details section, select the feed you want to connect to from the Feed dropdown.
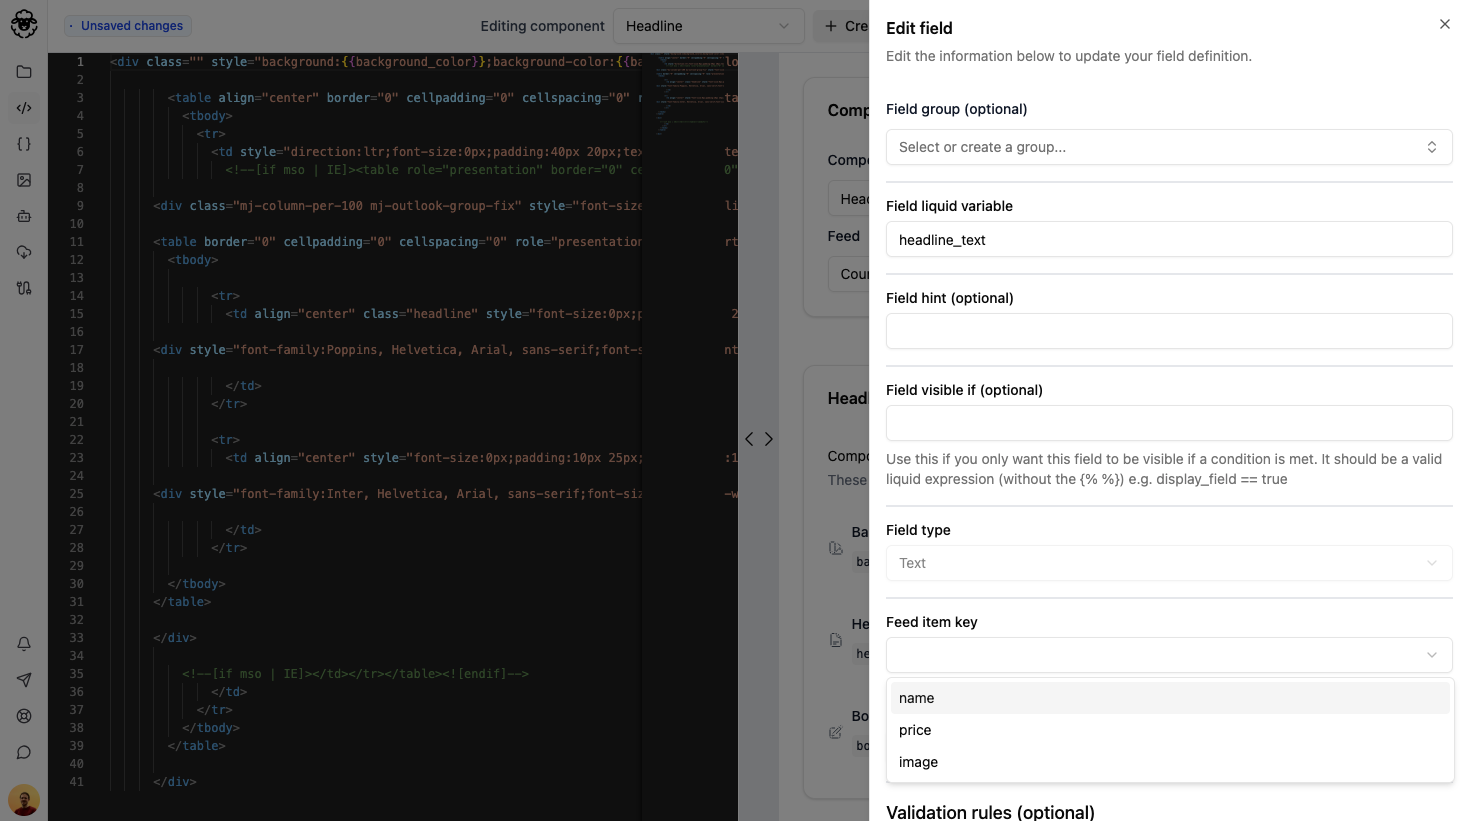
Now we can map individual component fields to the feed fields.
Open the edit fields panel, and see the Feed field name dropdown. Select the feed field name you want to map to the component field.
Using feeds in the email editor
Now that you have mapped the feed fields to the component fields, you can use the feed in the email editor.
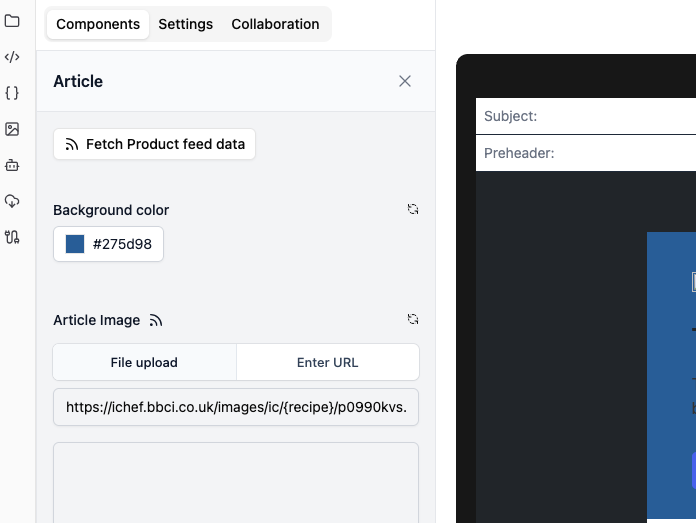
Add your component into the email and open it in the sidebar.
You will see a Fetch Data button. The individual fields that are linked to the feed will have an icon next to them to indicate that they are linked to the feed.
Now, enter the values for any parameters you have defined (if any), and click the Fetch Data button.
Now you can click the Apply button to apply the data to the component fields.